If you’re facing issues with your Recovery Partition in Windows 11, such as corruption, insufficient space, or the need to reposition it within your system drive, this comprehensive guide will help you seamlessly recreate that partition. Let’s dive into the step-by-step process!
Understanding the Recovery Partition
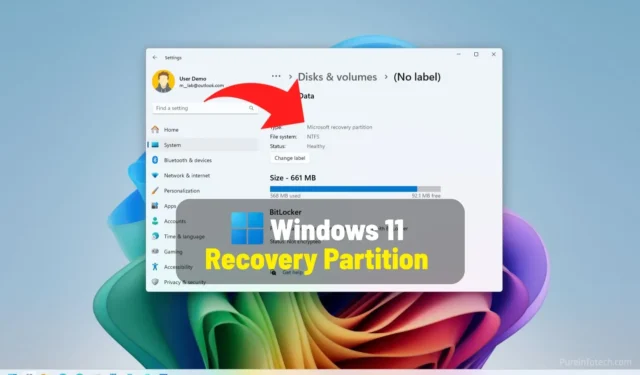
The Recovery Partition is an essential segment of your hard drive that houses the files needed to access the Windows Recovery Environment (WinRE).This specialized environment provides tools for recovery when your system encounters critical errors or failures, or when you need to restore your PC to its factory settings.
Whenever you head to Settings > System > Recovery and click the “Restart now” button for “Advanced startup, ” you are effectively launching functionalities that rely on the Recovery Partition.
Required Size for the Recovery Partition
The minimum size for the Recovery Partition is typically 300MB, as indicated on various Microsoft support pages. However, depending on various factors—including file system type and the size of the winre.wim file—the size can vary. It’s common to see partitions between 660MB and 822MB during checks. A safe guideline is to allocate about 1GB when manually creating or recreating your Recovery Partition.
Why You Might Want to Recreate Your Recovery Partition
There are several scenarios that might prompt you to delete an existing Recovery Partition and create a new one:
- Corruption of the current Recovery Partition necessitating restoration of its functionality.
- Reorganization of partitions where the existing Recovery Partition limits the extension of other partitions like the C: drive.
- Having multiple Recovery Partitions after an update or upgrade, which can lead to redundancy.
- Insufficient space in the current Recovery Partition for essential system tasks.
Note that Windows 11 does not include an integrated tool for managing the Recovery Partition but you can follow this guide to go through the necessary steps.
Recreating the Recovery Partition Using Existing Files
To create a new Recovery Partition by reusing the existing “winre.wim” file, follow these structured steps:
-
Open the Start menu in Windows 11.
-
Search for Command Prompt, right-click on the result, and select Run as administrator.
-
Disable the Windows Recovery Environment (WinRE) by entering:
reagentc /disableQuick note: This command disables WinRE, moving the “Winre.wim” file from the Recovery Partition to the “Recovery” folder on the C drive. -
Type the command to launch DiskPart:
diskpart -
List the system drives:
list disk -
Select the primary drive:
select disk 0 -
List the available partitions:
list partition -
Select the Recovery Partition:
select partition X(Replace X with the partition number for your Recovery Partition.)
-
Delete the current Recovery Partition:
delete partition override Quick note: At this stage, you can use the Disk Management tool to extend your Windows 11 installation drive, but leave at least 1GB to recreate the Recovery Partition.
 -
Create a new Recovery Partition:
create partition primary
-
Format the new partition:
format fs=ntfs quick -
Set the new partition ID as the Recovery Partition:
set id=de94bba4-06d1-4d40-a16a-bfd50179d6ac override -
Exit DiskPart:
exit -
Re-enable WinRE:
reagentc /enableQuick note: This action will also relocate the “Winre.wim” back to the Recovery Partition. -
Verify the Windows Recovery Environment status:
reagentc /info
Upon completion, your new Recovery Partition will be ready and positioned next to the Windows 11 installation partitions.
Creating the Recovery Partition from Scratch
If the current Recovery Partition is corrupted or has issues, follow this procedure to create a new partition using the “Winre.wim” extracted from the installation files of Windows 11:
-
Begin by opening the Start menu.
-
Locate Command Prompt, right-click, and choose Run as administrator.
-
Launch DiskPart:
diskpart -
Show the available disks:
list disk -
Select the main disk:
select disk 0 -
List the partitions:
list partition -
Select the old Recovery Partition:
select partition X(Ensure you replace X with the partition number.)
-
Delete the Recovery Partition:
delete partition override Quick note: Ensure you have at least 1GB of space for the new Recovery Partition after any resizing.
 -
To create a new partition, use:
create partition primary
-
Alternatively, specify exact size:
create partition primary size=1024 -
Format the partition as NTFS:
format fs=ntfs quick -
Designate the new partition as the Recovery Partition:
set id=de94bba4-06d1-4d40-a16a-bfd50179d6ac override -
Exit DiskPart:
exit -
Connect your USB bootable drive or mount the Windows 11 ISO.
-
Create new directories to organize your files:
mkdir "%USERPROFILE%\Downloads\Images""%USERPROFILE%\Downloads\Mount" -
Copy the “Install.wim” to your designated folder:
xcopy "D:\Sources\install.wim""%USERPROFILE%\Downloads\Images\"/H /E /C /I /Y
-
Mount the Install.wim image:
dism /Mount-Image /ImageFile:"%USERPROFILE%\Downloads\Images\install.wim"/Index:6 /MountDir:"%USERPROFILE%\Downloads\Mount"Important: Use the correct index number corresponding to your Windows version. Usedism /Get-WimInfo /WimFile:X:\sources\install.wimto verify. -
Rename any existing ReAgent file:
ren C:\Windows\System32\Recovery\reagent.xml Reagent.xml.bak -
Copy the necessary files to the Recovery folder:
xcopy "%USERPROFILE%\Downloads\Mount\Windows\System32\Recovery\winre.wim""C:\Windows\System32\Recovery\"/H /E /C /I /Yxcopy “%USERPROFILE%\Downloads\Mount\Windows\System32\Recovery\reagent.xml””C:\Windows\System32\Recovery\”/H /E /C /I /Y

-
Re-enable the recovery environment:
reagentc /enable
-
Verify the state of the Windows Recovery Environment:
reagentc /infoQuick note: If it shows as “Enabled” with a location path, your setup is successful.
Once these steps are completed, your new Recovery Partition will be set up and functional. You can test whether it works by going to Settings > System > Recovery and clicking the “Restart now” button under “Advanced startup.” Successful loading of the recovery environment indicates everything is working as intended.
If you encounter difficulties with using reagentc /enable or face issues copying the winre.wim image, you may need to do a manual configuration. You can create the recovery folder with mkdir R:\Recovery\WindowsRE and copy the winre.wim image there. After that, utilize reagentc /setreimage /path R:\Recovery\WindowsRE to set the Recovery Partition and run reagentc /enable to enable WinRE.
While technically not required, a Recovery Partition is essential for accessing valuable troubleshooting tools like System Restore, Startup Repair, and system resets in Windows 11.
What method did you utilize to recreate your Recovery Partition? This process can seem daunting, so if you have any further questions or need clarification, feel free to reach out in the comments.
Frequently Asked Questions
1. Why might I need to recreate my Recovery Partition?
You might need to recreate your Recovery Partition if it’s corrupted, lacks sufficient space, is incorrectly positioned, or if there are redundant partitions. Recreating it can help restore essential recovery functionality.
2. What is WinRE and why is it important?
The Windows Recovery Environment (WinRE) is a set of tools included with Windows 11 designed to troubleshoot and resolve critical issues. It’s vital for accessing recovery options like System Restore and Startup Repair when your system fails to start properly.
3. Can I operate Windows 11 without a Recovery Partition?
While it’s possible to run Windows 11 without a Recovery Partition, doing so may limit access to crucial troubleshooting tools necessary for system recovery and maintenance. It’s highly recommended to keep a functioning Recovery Partition to ensure system stability.
Related Articles:

Step-by-Step Guide to Mapping a Network Drive on Windows 11
14:43
Troubleshooting Error Code 0x426-0x0 in Microsoft 365 (Office) Apps on Windows 11 and 10
12:45
Windows 11 Build 27818 Introduces Enhancements in the Canary Channel
12:43
Leave a Reply ▼