There are a multitude of ways to create a Minecraft server in 2024. So find out what to do to create yours for free.
Minecraft is a great game in which you can do an unimaginable number of things.
But playing Minecraft alone is good, but with friends it’s even better. However, to play with them, you need a server.
And while there are different ways to get one such as going through a paid host, it is also possible to do it for free.
So without further ado, find out how you can create your own Minecraft server for free.
Summary
Create a free Minecraft server yourself
Step 1: Get the latest version of Java
The first step in setting up a Minecraft server is to make sure you have the latest version of Java installed. Minecraft requires Java to run the game and having the latest version will allow you to run your server properly.
You can install the latest version of Java here.
Step 2: Create the Minecraft Server
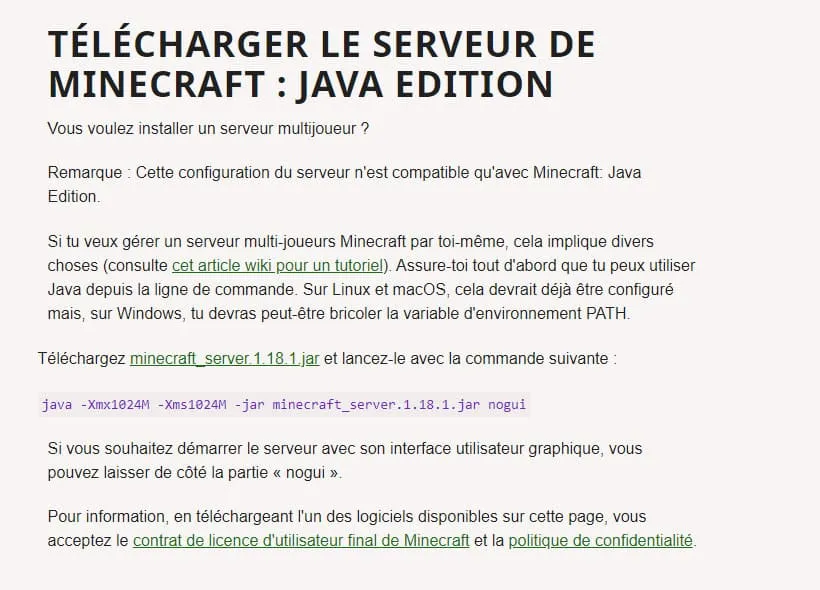
The first step in downloading a Minecraft server is to download the Server.jar file from the Minecraft website.
Once on the page, click on the Download Minecraft server jar link as directed.

Java is essential software for playing Minecraft.
Before running this. jar file, you will need to create a folder that will contain all the server files. To do this, go to your desktop and create a new folder where you will move the Server.jar file.
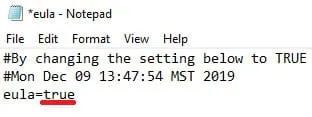
Then launch the file. This will create a few configuration files which will be carefully placed in your folder. With these files we must accept the EULA agreement so that our server can work without stopping immediately. Open the eula.text file.
When you open it, you should see the line eula=false. Change it to eula=true. Then launch the server.jar file again.

And now your new server is officially launched and ready to go!
Step 3: Configure the server
But before you jump straight into your server with your friends, you’re going to have to configure it.
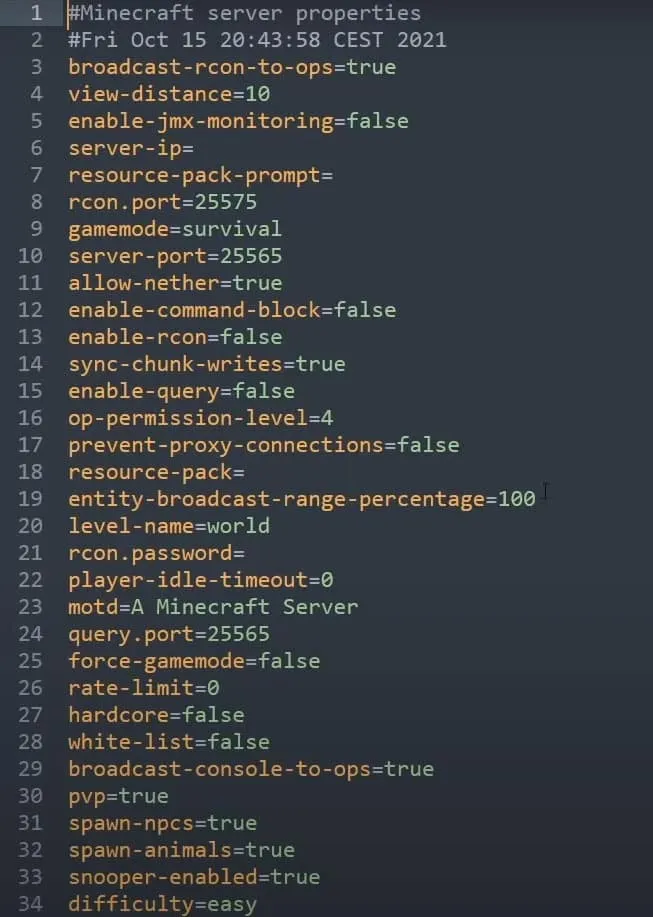
To do this, right-click on the “server.properties” file and then open it with notepad.
From there, you can change any options you want. Don’t forget to save the file if you make any changes.

Your Minecraft server settings.
Step 4: Join the server
Now that your server is configured, you can now launch it using the “Start.bat” file.
To then join your server, you must open Minecraft, go to “Multiplayer” , click on add server and type “localhost” .
So that your friends can join you on your server, all you need to do is give them your IP address, which you can find on monip.com for example.
However, you will need to open your internet ports. To do this, we advise you to refer to this detailed guide.
Create a Minecraft server using a host
To create a Minecraft server for free, Aternos is also an excellent solution that simplifies the process. First, go to the Aternos website and create an account by following the on-screen instructions.
Once your account is created, you will be able to configure your server by choosing the type of world, mods and plugins you want to use. Aternos supports a variety of Minecraft versions and modpacks, allowing you to customize your gaming experience.
After configuring the settings, launch your server and invite your friends to join by sharing the IP address provided by Aternos. Although the service is free, it is important to note that Aternos servers must be activated manually and may experience a queue at certain peak times.
And there you have it, now you know how to create and configure your own Minecraft server.


Leave a Reply