In today’s guide, we’ll cover four distinct techniques, including three that make use of Windows 11’s default settings and one that involves a third-party tool.
Let’s get going.
Tips for Resetting Every Audio Configuration in Windows 11
Any modifications you have made to the audio settings will be scaled back to the default or basic settings when you first install Windows 11. This post will demonstrate how to reset the audio settings, audio driver, and audio services on your Windows 11 computer.
Restore the default audio settings in Windows 11
Here are the steps you can take to instantly reset all audio settings and equalizer adjustments to their default values.
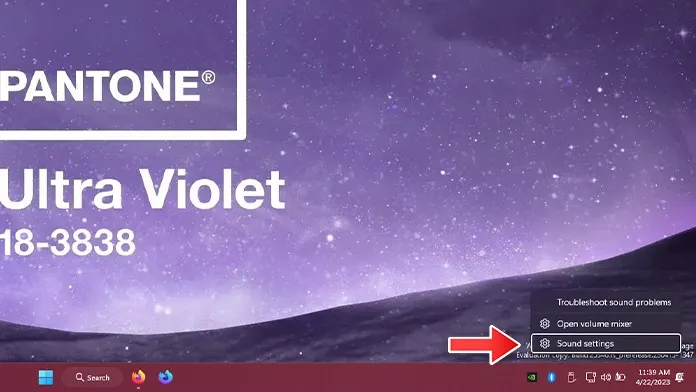
- Choose the volume icon with the right click on your Windows 11 computer’s taskbar.
- Choose Sound Options from the pop-up context menu.
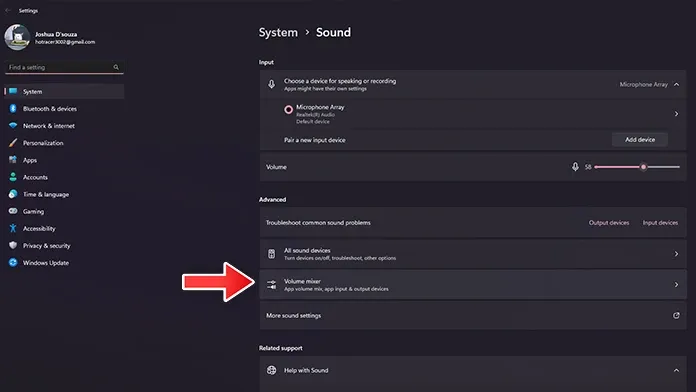
- Locate the Advanced header by scrolling down.
- Choose the Volume Mixer option under Advanced.
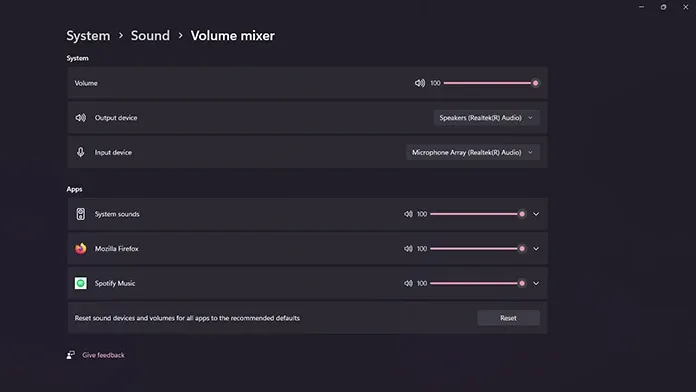
- Now that the Volume Mixer page has loaded, you can see the volume settings for various apps as well as the input and output devices.
- You ought to notice the Reset button near the bottom of the page.
- To return all audio input and output levels to their initial settings, click the Reset button.
Restore the default audio driver for Windows 11
Your system’s audio drivers assist in generating the necessary output through the PC-connected speakers. The audio driver is now updated frequently to enhance performance and address some bugs. New driver updates occasionally might not be the greatest due to a problem they introduced at the same time as the update. In this situation, you can quickly reset the driver to restore the audio driver to its factory settings. Here’s how to go about doing that.
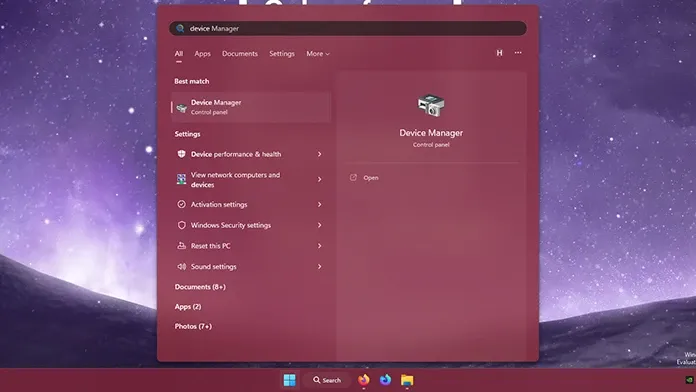
- To access the Start menu, click the Windows symbol on the Taskbar.
- Look for Device Manager right now. When you see the outcomes, open it.
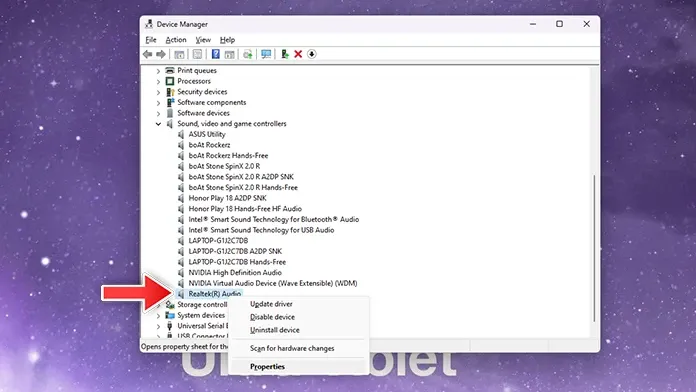
- The arrow that says “Sound, Video, and Game Controller” should be clicked.
- Right-click the audio driver and select Properties to continue.
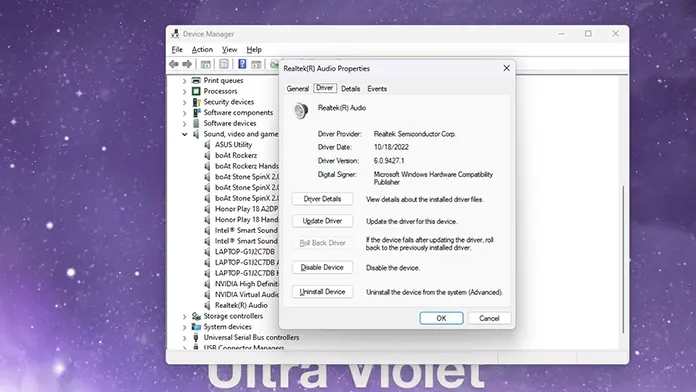
- Now the Driver window will appear.
- If the option is present, select Roll Back Driver by clicking the Driver tab.
- If not, you have the option to remove the audio driver from your computer by uninstalling Driver.
- You must restart your computer after doing this so that Windows can identify the audio hardware and install the default audio driver version.
Windows 11 Audio Services should be reset to default
In order for the devices to communicate with your PC efficiently, Windows 11 has a variety of services that are typically operating. The Windows Endpoint Audio service can be resumed with a few mouse clicks in the case of audio. On a Windows 11 computer, follow these steps to restart the audio services.
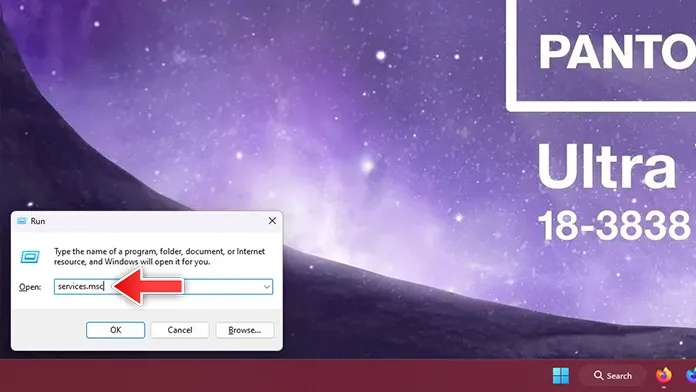
- By holding down the Windows and R keys, the Run dialog box will appear.
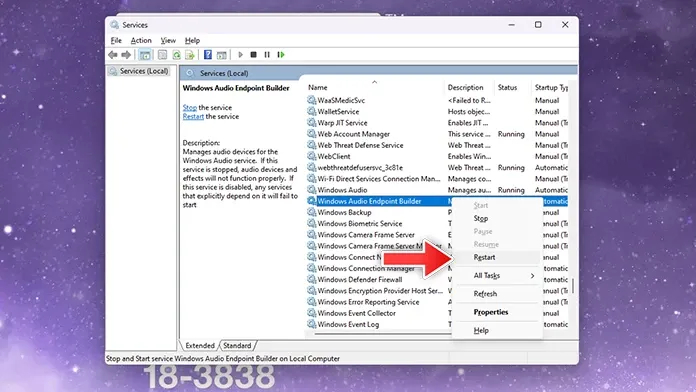
- Type services.msc into the search box and press the enter key.
- Press the W key on your keyboard when the Services window appears.
- When you can highlight the Windows Audio Endpoint Builder, keep pressing the W key.
- Its state should be Running, as you can see.
- Click on it with the right mouse button and select Restart.
- As an alternative, you might first select Refresh and then select Restart the Services.
- If you want to restart the services, you will be prompted. Choose yes.
- The Windows Audio Endpoint Service on your Windows 11 computer has now been restarted.
Windows 11 DTSX Ultra Equalizer reset
Some Windows 11 computers, particularly those made by Asus, have the DTSX Ultra Audio Equalizer preinstalled on their platforms. Using this equalizer, you can quickly tune and modify your audio effects. You can easily do this by following these procedures if you think the audio levels are off or you just want to rest it.
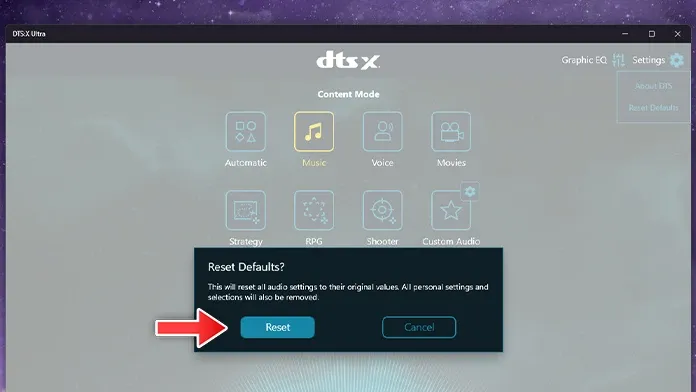
- Type DTSX into the Start menu to bring it up. Click on the app when you see it to start the audio equalization.
- The Settings menu should be visible at the upper right of the program.
- Choose the Reset Defaults option from the Settings menu by clicking on it.
- If you choose to restore the default settings, you will be prompted.
- On the Reset button, click. We’ll now restore the audio equalization to its default settings.
Summary
This completes the Windows 11 tutorial on how to quickly restore the default audio settings and other audio services. Everything will be returned to default settings after you restore the audio levels and settings. You have the option of leaving the audio levels at their default settings or making changes to the settings to create bespoke audio levels that suit your preferences.
Please feel free to ask any questions you may have in the comments area below.


Leave a Reply