
For enthusiasts of Rocket League, optimizing your settings can significantly improve your gameplay, allowing for enhanced maneuverability and more precise control. Below is a comprehensive guide showcasing the ideal camera, controller, and graphics settings highly recommended for this exciting game.
Rocket League stands out as a unique sports title, delivering a thrilling and frenetic car soccer experience. Players must make quick decisions and customize various aspects of their game, from picking the right car model to adjusting hitboxes for peak performance.
Customizing in-game controller and camera settings is a direct way to affect your experience, and with the right configurations, executing even the hardest maneuvers becomes much simpler. Therefore, here are the camera and controller settings we recommend for Rocket League.
Table of Contents
- Top Rocket League camera settings
- Optimal controller settings
- Best graphics settings for Rocket League
- Recommended controller keybinds
- Instructions to change keybinds

Agility in Rocket League is crucial for success.
Top Rocket League camera settings
Your camera configurations might seem insignificant in the grand scheme; however, factors like height, zoom, and various subtleties can greatly influence your field of view. The default settings may not be tailored to your preferences.
Here are the recommended custom camera settings for Rocket League:
- Camera Shake: Disabled
- Field of View: 110
- Distance: 280
- Height: 110
- Angle: -3.0
- Stiffness: 0.45
- Swivel Speed: 5.5
- Transition Speed: 1.2
- Invert Swivel: Disabled (personal choice)
- Demo Transition Time: 0.75

These settings will keep your focus on the ball consistently.
To kick things off, it’s essential to **disable Camera Shake** as it can be distracting and perplexing. Setting your **Field of View** to 105 allows for expansive visibility without pushing it to the maximum.
In terms of **Distance**, aim for around 280, while keeping the **Height** at 115. An excessive height can skew your view, and same goes for distance. The **Angle** can remain at a neutral -3.0, not largely affecting gameplay.
For **Stiffness**, anything below 0.55 is suitable, so slightly reducing it helps keep the camera steady. Both **Swivel Speed** and **Transition Speed** can be adjusted based on your reflexes and adaptation to quick movements, so we suggest setting them to 5.5 and approximately 1.15, respectively. We recommend that **Invert Swivel** is turned off as it could complicate your gameplay. Lastly, the **Demo Transition Time** is a factor that affects how promptly your camera shifts after being knocked out; this setting doesn’t alter gameplay dynamics, so it’s best kept as is.
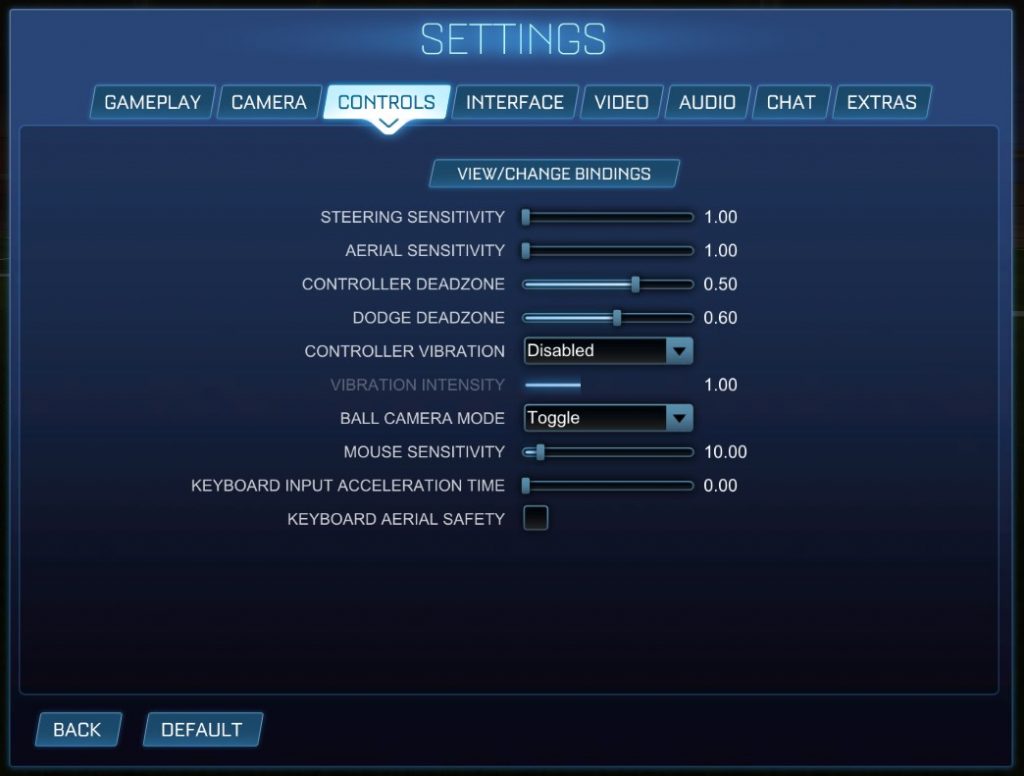
Optimal controller settings
Here are the ideal controller settings for Rocket League:
- Steering Sensitivity: 1.00
- Aerial Sensitivity: 1.00
- Controller Deadzone: 0.50
- Dodge Deadzone: 0.60
- Controller Vibration: Disabled
- Vibration Intensity: N/A
- Ball Camera Mode: Toggle
Mastery of your vehicle is essential to excel in Rocket League.
It’s crucial to maintain your **Steering Sensitivity** and **Aerial Sensitivity** at the lower setting. Tinkering with your car’s traction control may be acceptable in racing simulators, but it’s not necessary here.
The **Controller Deadzone** and **Dodge Deadzone** settings should be kept similar, at 0.50 and 0.60, respectively. Those familiar with FPS games will recognize dead zones, defining how far the thumbstick must move before your vehicle reacts. A neutral approach works nicely in Rocket League.
Whether to enable **Controller Vibration** comes down to personal preference, yet for optimal performance, it’s advisable to keep it off.
Setting your **Ball Camera Mode** to toggle is beneficial, allowing constant ball tracking throughout the match while limiting unnecessary button presses.
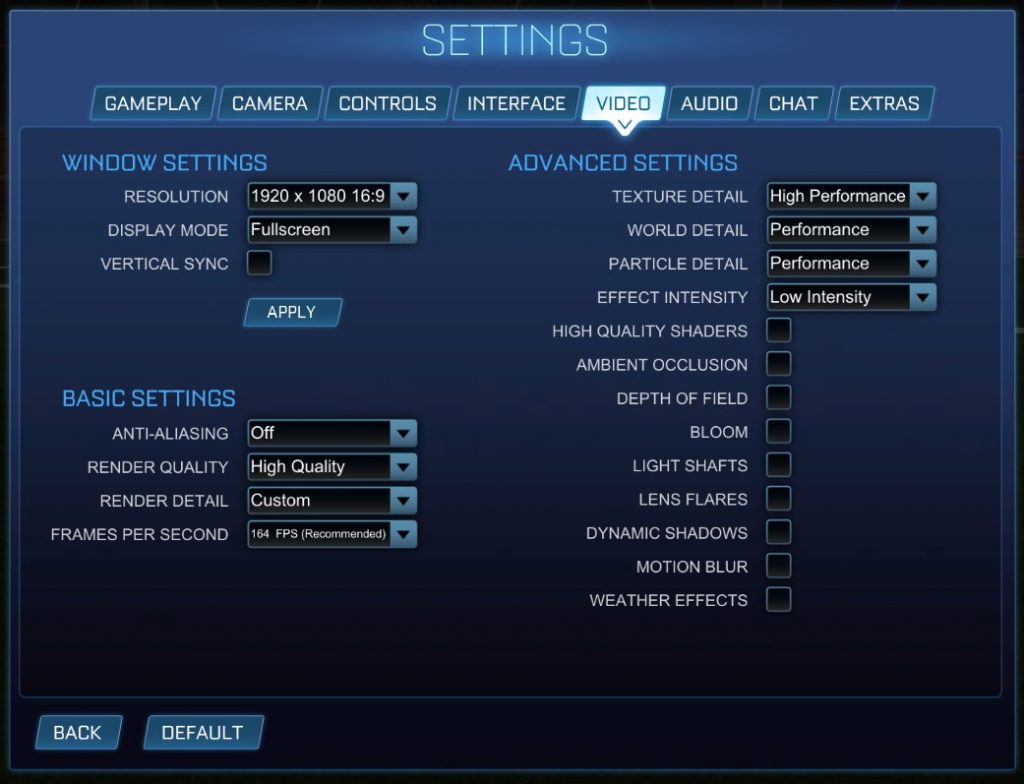
Best graphics settings for Rocket League
Numerous Rocket League players, including professionals, opt for video settings prioritizing performance. While this often sacrifices graphical quality, it enhances FPS, delivering a smoother gameplay experience.
Disabling Vertical Sync is vital for minimizing input lag, especially for console users. Although screen tearing may be a bit uncomfortable initially, your eyes will adapt, leading to a significant increase in performance.
The following are the recommended graphics settings for achieving peak performance in Rocket League:
Window Settings:
- Resolution: 1920 x 1080 16:9
- Display Mode: Fullscreen
- Vertical Sync: Off
Basic Settings:
- Anti-Aliasing: Off
- Render Quality: High Quality
- Render Detail: Custom
- Frames per Second: Match your monitor’s refresh rate
Advanced Settings:
- Texture Detail: High Performance
- World Detail: Performance
- Particle Detail: Performance
- Effect Intensity: Low Intensity
- High Quality Shaders: Off
- Ambient Occlusion: Off
- Depth of Field: Off
- Bloom: Off
- Light Shafts: Off
- Lens Flares: Off
- Dynamic Shadows: Off
- Motion Blur: Off
- Weather Effects: Off
Boost your FPS for a seamless experience.
Recommended Rocket League controller keybinds
After adjusting your settings, it’s time to take it a step further by customizing your controller keybinds in Rocket League. Though the default keybinds are effective, tweaking them can grant you an edge against your competitors.
While there’s flexibility in how you map actions to buttons, here are some suggestions to simplify your controls:
| Action | Default Button | Customized Keybind | Justification |
| Powerslide | Square / X | L1 / Left Bumper | Switching to the bumper enhances accessibility during gameplay, allowing for simultaneous Powerslide and Boost activation. |
| Air Roll Left / Right | Square / X + Left Thumbstick (Direction) | L1 / Left Bumper & R1 / Right Bumper | Using bumpers for air rolling is more intuitive and requires less thumbstick movement. |
| Scoreboard | LB | Square / X | With Powerslide reassigned to L1, it makes sense to place the scoreboard on the available button. |
Instructions to change keybinds
- Access the “Settings” menu in Rocket League
- Select “Controls” from the top menu, then choose “View/Change Bindings”
- Identify the binding you wish to modify, then press the desired button on your controller for the new assignment.
Open Rocket League’s settings
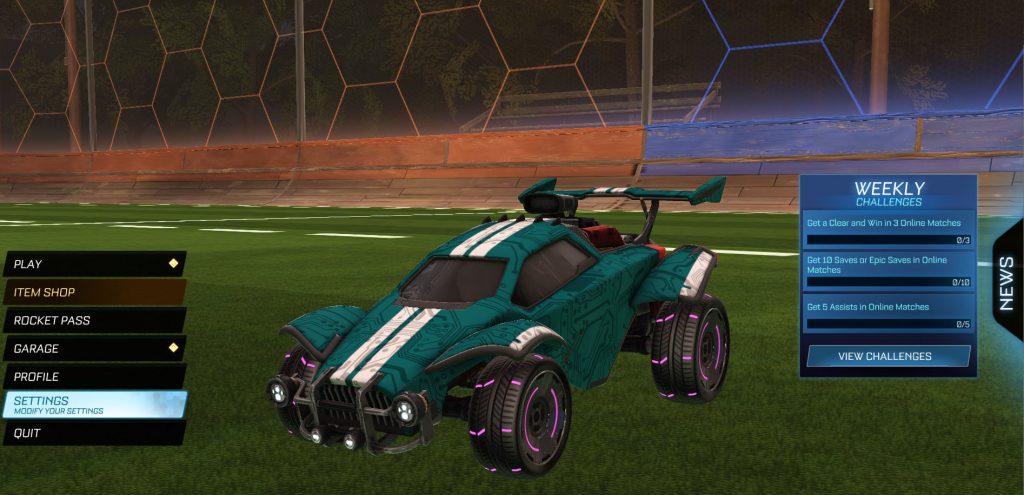
Accessing Settings is easiest from the main game menu.
Start by navigating to the game’s settings, where the keybind modification option is located. It’s best to access this from the main menu for convenience.
Navigate to Controls, then select “View/Change Bindings”
Bindings are easily located at the top of the menu.
Once you’re in the settings, go to the Controls category and select the “View/Change Bindings” option at the top of that section.
Select the binding you wish to adjust and press the new button
 This is where you can define your new keybinds.
After reaching this screen, scroll through the options until you find the action to modify. Hit A/X on your controller, and a prompt will appear to “Press any button to bind.” Select the button you wish to assign, and your new binding will be registered. You can then exit and test your configurations in-game.
Rocket League ranks explained | How to use Rocket League’s trade-in feature | How to obtain blueprints in Rocket League


Leave a Reply ▼